
Perfecting Smokey Eye Techniques
- welykeacademy
- Dec 4, 2025
- 4 min read
If you’ve ever admired that sultry, smouldering look that turns heads, you know the power of a perfectly done smokey eye. But let’s be honest - it can feel intimidating. How do you get that seamless blend without looking like you’ve been in a fight? Don’t worry, I’ve been there, and I’m here to guide you through every step. Whether you’re just starting out or want to sharpen your skills, this smokey eye tutorial will help you create stunning looks that wow every time.
Step-by-Step Smokey Eye Tutorial: Your Go-To Guide
Let’s break it down into manageable steps. The key to a flawless smokey eye is layering and blending, but also knowing which tools and products to use. Here’s how I approach it:
Prime Your Eyelids
Start with a good eyeshadow primer. This creates a smooth base and helps your shadows stay put all day. Trust me, skipping this step is like building a house without a foundation.
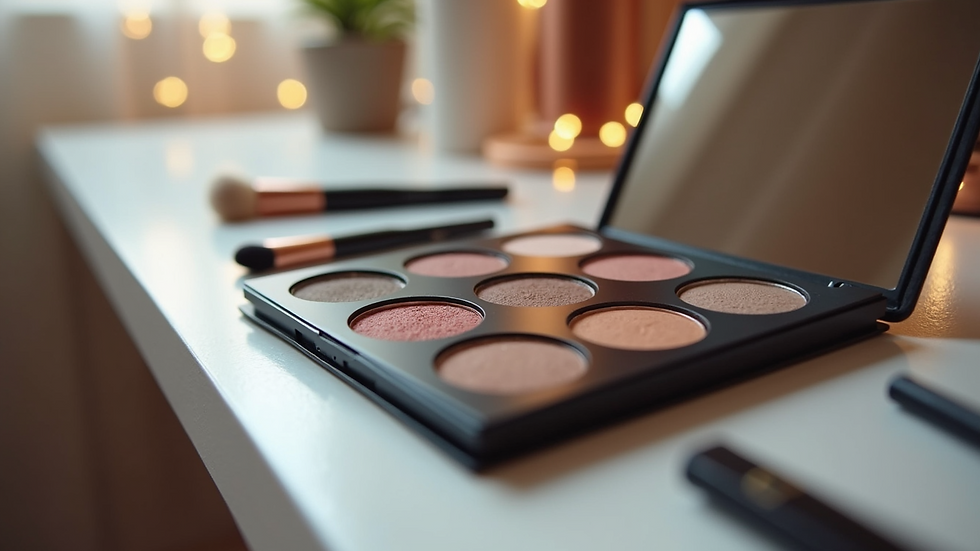
Choose Your Palette
Classic smokey eyes usually involve shades of black, grey, and brown. But don’t be afraid to experiment with navy, plum, or even emerald for a twist. Pick a light shade for the base, a medium shade for the crease, and a dark shade for the outer corner.
Apply the Base Shade
Sweep the lightest shade all over your lid up to the brow bone. This evens out the skin tone and makes blending easier.
Define the Crease
Using a fluffy brush, apply the medium shade into the crease. Use windshield wiper motions to blend it out softly. This adds depth without harsh lines.
Darken the Outer Corner
Now, the magic happens. Take your darkest shade and pack it onto the outer corner of your eye in a V shape. Blend it inward gently. This is where you create that smokey effect.
Line Your Eyes
Use a pencil or gel liner along your upper and lower lash lines. Smudge it slightly with a brush or cotton swab for softness.
Highlight the Inner Corner and Brow Bone
A touch of shimmer or a light matte shade here brightens your eyes and adds contrast.
Finish with Mascara
Curl your lashes and apply a few coats of mascara. For extra drama, add false lashes.
Remember, blending is your best friend. Take your time and build the colour gradually. Rushing leads to patchy results.

Why This Smokey Eye Tutorial Works for Everyone
You might wonder, “Is this smokey eye tutorial really for me?” The beauty of this technique is its versatility. Whether you have hooded eyes, monolids, or deep-set eyes, you can adapt these steps to suit your shape. For example:
Hooded eyes: Focus on blending the crease colour slightly above your natural crease to create the illusion of depth.
Monolids: Use a gradient effect with lighter shades near the lash line and darker shades higher up.
Deep-set eyes: Keep the darkest shades closer to the lash line and blend upwards to avoid making your eyes look sunken.
Plus, this tutorial works for day or night looks. For daytime, keep the dark shade subtle and skip the liner smudging. For evening, go bold and dramatic.
If you want to dive deeper into professional smokey eyes techniques, check out this smokey eyes techniques course that offers hands-on training and expert tips.
Are Smoky Eyes Attractive?
Let’s address the big question: Are smoky eyes attractive? The answer is a resounding yes! Smoky eyes have been a staple in beauty for decades because they enhance the natural shape of the eyes and add a mysterious allure. They can make eyes look bigger, more defined, and incredibly seductive.
But attractiveness isn’t just about the look itself. It’s about the confidence you wear with it. When you master this technique, you’ll feel empowered to express your creativity and personality. And that confidence? It’s the real secret to turning heads.

Tools and Products That Make a Difference
Let’s talk gear. Having the right tools can elevate your smokey eye game from “meh” to “wow.” Here’s what I recommend:
Brushes:
- Fluffy blending brush for the crease
- Flat shader brush for packing colour on the lid
- Small pencil brush for smudging liner and adding detail
Eyeshadow Primer: Keeps your look fresh and crease-free
Eyeshadow Palette: Choose one with a good mix of mattes and shimmers
Eyeliner: Pencil for smudging, gel for precision
Mascara: Volumising and lengthening formulas work best
Optional: False lashes for extra drama
Pro tip: Clean your brushes regularly. Dirty brushes can muddy your colours and cause irritation.
Practice Makes Perfect - Your Next Steps
Now that you have the basics, it’s time to practice. Don’t be discouraged if your first few attempts aren’t flawless. Like any skill, smokey eyes techniques improve with repetition and patience.
Try experimenting with different colour combinations and intensities. Take photos to track your progress. And if you want to take your skills to the next level, consider enrolling in a professional course. Welyke Academy offers comprehensive training that can help you master smokey eyes and other makeup artistry skills with real-world experience.
Remember, every expert was once a beginner. So grab your brushes, have fun, and watch your confidence soar!
Ready to transform your makeup skills? Dive into the world of smokey eyes techniques and unlock your full potential today!


Comments